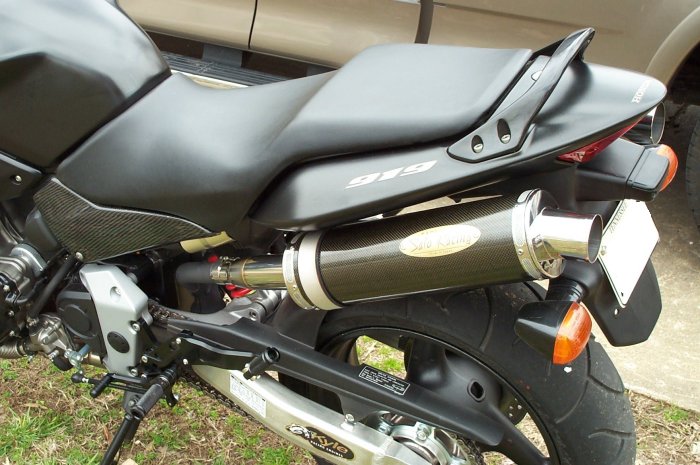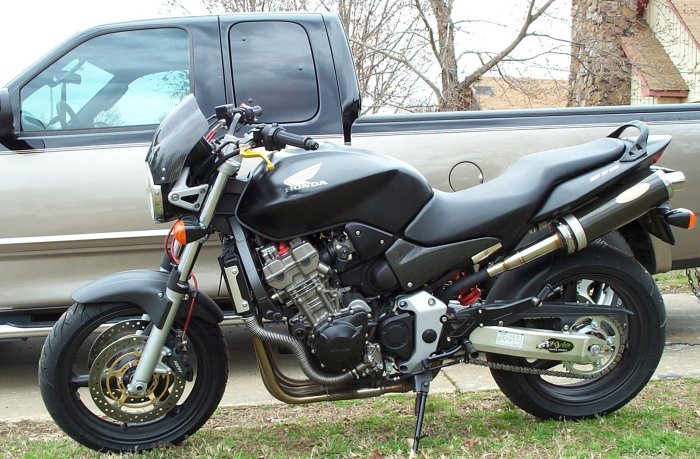
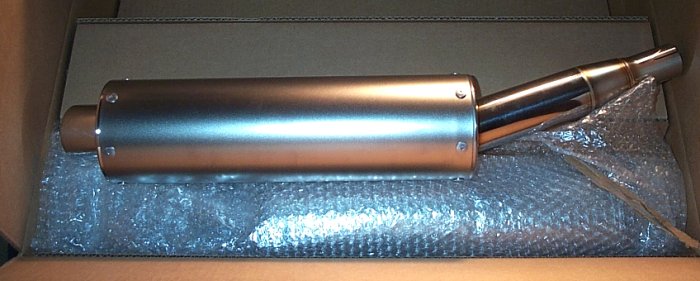
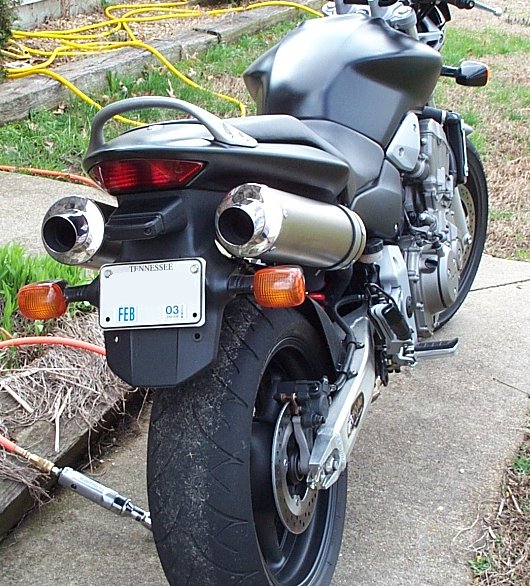
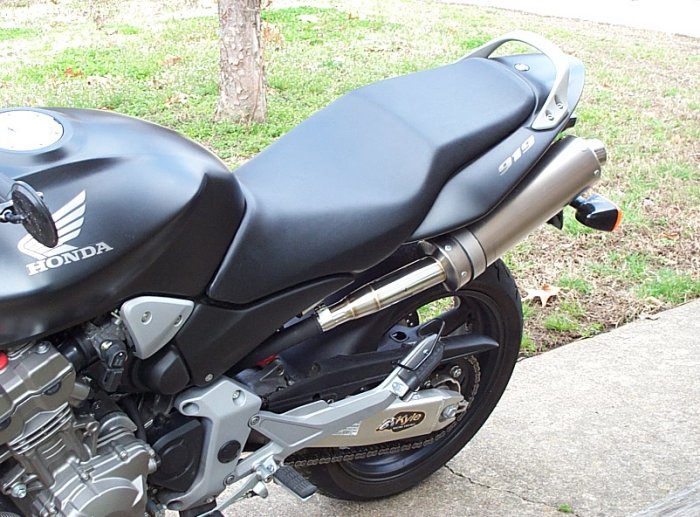
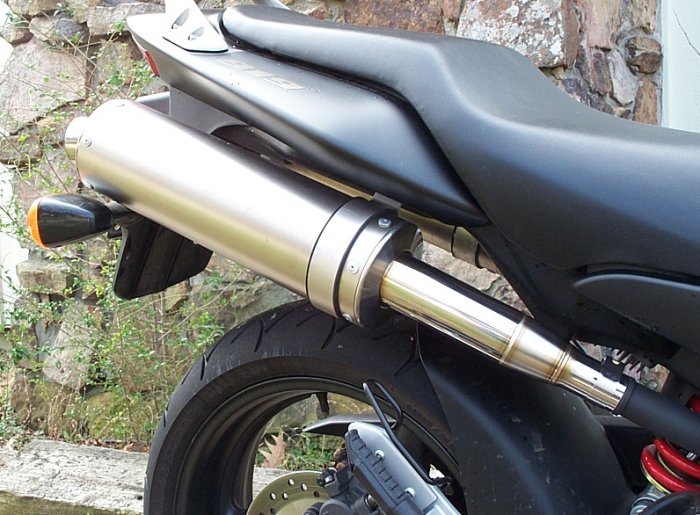
Sato Exhausts for the 919
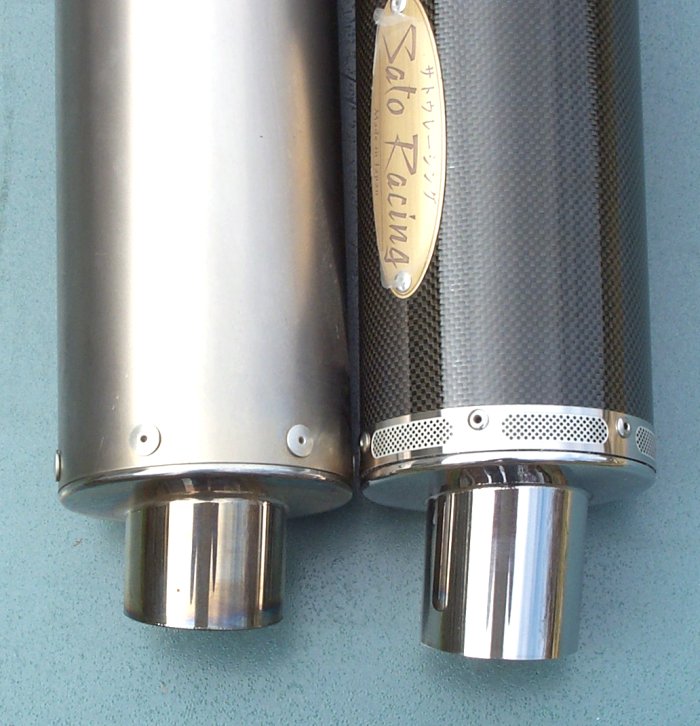
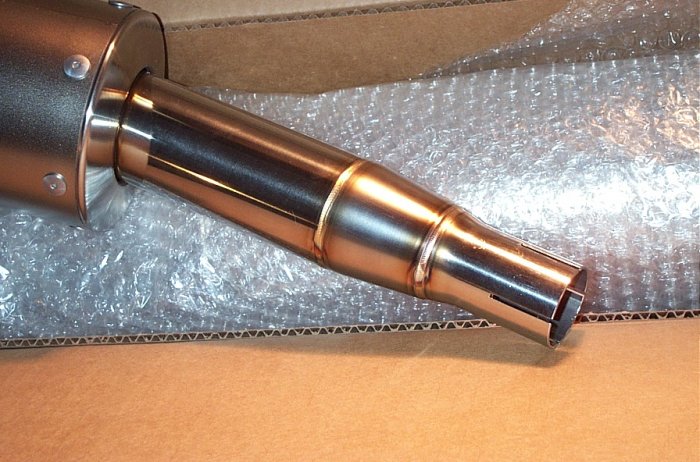
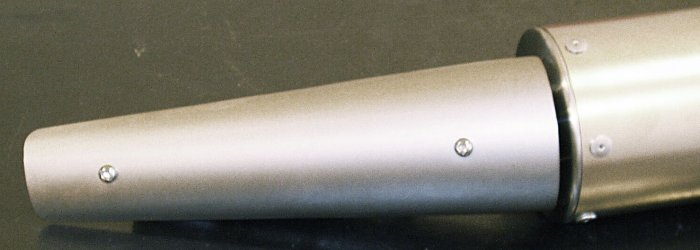
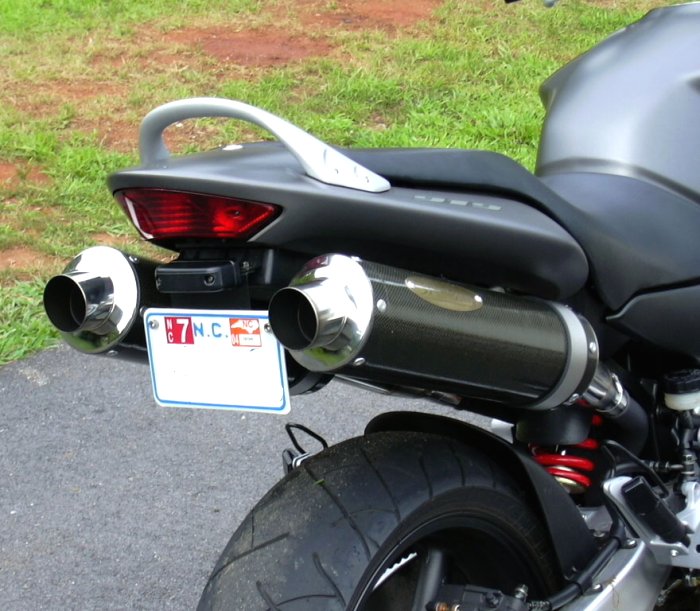
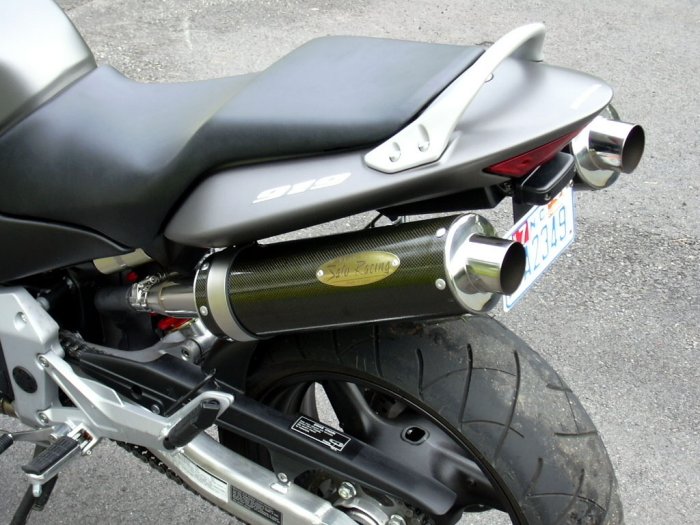
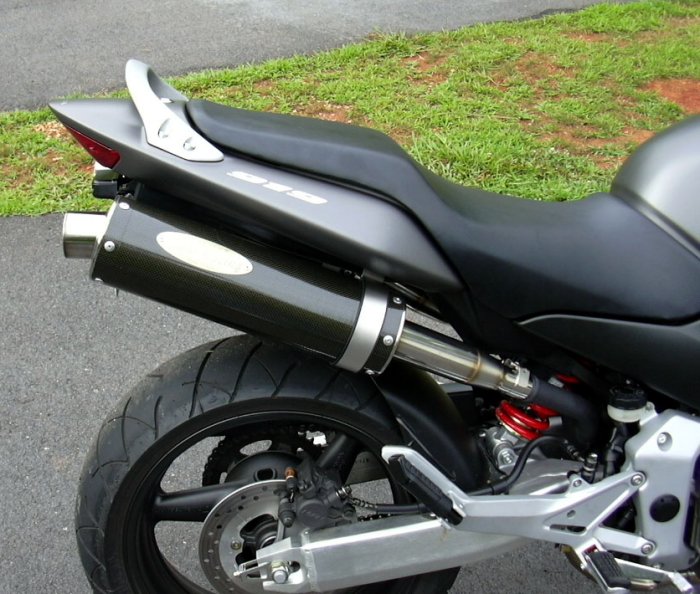
UPDATE: 03/17/04 Just went out for my first real outing with the new exhausts for some testing & map development. The sound is perfect to me & the throttle response is way better than it was previously! The bike truly feels like it is connected to your wrist. I changed the mapping a bit & if you want the new map it can be downloaded here. UPDATE: 03/12/04 When the Sato exhausts first came out for the 919 the only complaint was that they were too loud. Of course some Sato owners loved the obnoxious bite, but many just weren't very happy with the sound decibel level. Sato has a long standing reputation for performance & build quality as well as continued Research & Development which they have once again proven is well deserved. They redesigned the exhaust cannisters to be not only quieter by using a smaller core, but they also lengthened the nozzle to help alleviate the inherent problem of the exhaust stink that encompasses the rider & passenger due to the low pressure pocket of air behind the rider that pulls the exhaust gasses up from the undertail exhaust. This condition has been well documented & reported with both stock & aftermarket exhausts so while the problem is not caused by the Sato exhausts they are working on ways to make the condition less prominent. Below is a side by side comparison of the old style Ti cannister next to the new carbon cannister with the longer nozzle. (also note the new banding)
Weight comparison per pair Stock cannisters
18lbs These sound
great. They still have that low rumble that sounds like
it means business, but they no longer shake the pictures
on the wall inside your home when the bike is idling in
the driveway & your teeth don't chatter when you wind
it up past 6000rpm
More high res pics can be
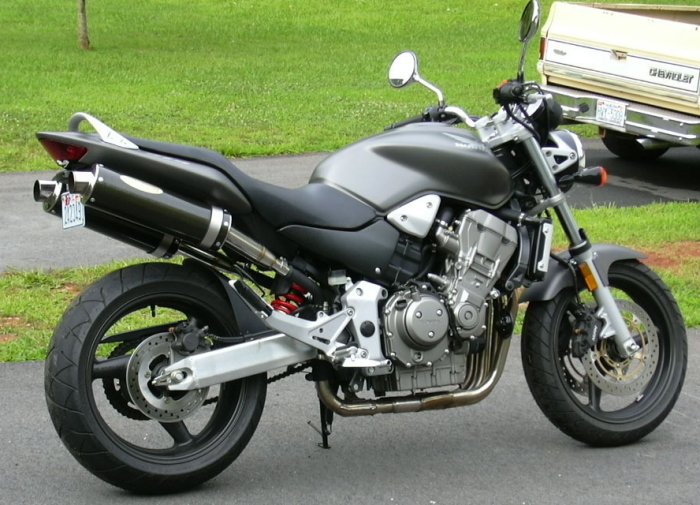
viewed at the following links: Original install While the Sato's are not quite as glamorous looking as the Moriwaki's that I have been using they are without a doubt a very impressive set of exhausts. Both are superb examples of the flawless build quality we have come to expect from these two premium Japanese exhaust manufacturers. Without any mapping
changes the Sato's pull significantly harder than the
Moriwaki's between 4000-7500 rpm. They are also louder
than the Mori's with a deep & throaty tone. I had
been worried that because of the large core diameter that
they would be too loud, but I am very pleased with the
sound level & so are my neighbors The entire install took less than 30 minutes & that includes the time it took to remove the Moriwaki exhausts. The kit even comes with new clamps & no gaskets are needed as they are designed to fit directly onto the stock Y-pipe I'll write more in the upcoming weeks after I get a chance to really run these things out, below you will find installation instructions, pictures & even a dyno chart. Available
from Kyle Racing |
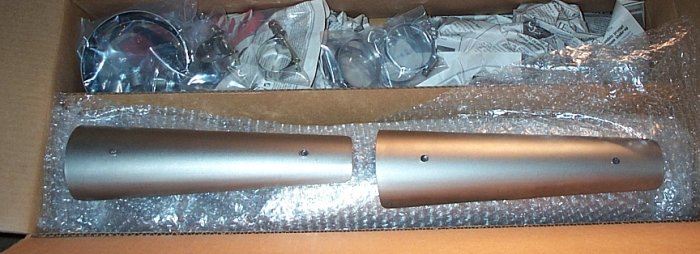
Heat Shields
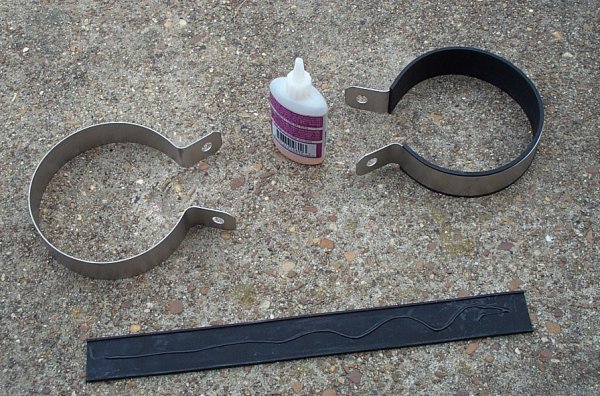
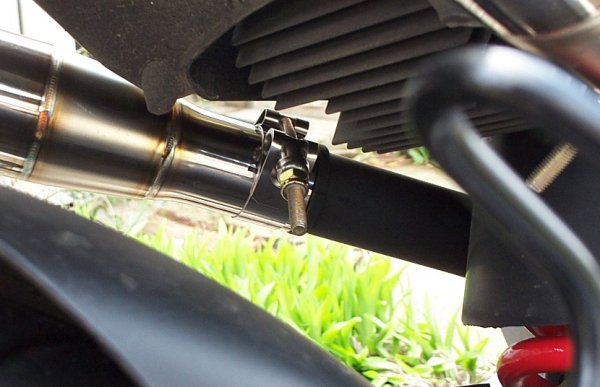
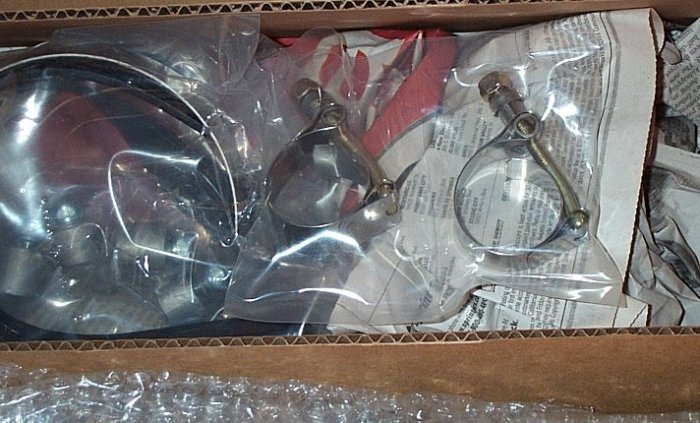
The installation is quite simple I will skip the basic details of removing the seat, plastic & existing exhaust etc & just concentrate on the parts in the kit: You will need to glue the rubber straps into the metal bands. I suggest using rubber cement or silicone, but just about any adhesive will do as you can see in the following pic I have used a gel type cyanoacrylate (because I was out of silicone). Just a little bit is all that is neccesary as you simply need to keep them from sliding around until you have firmly tightened them against the cannister.
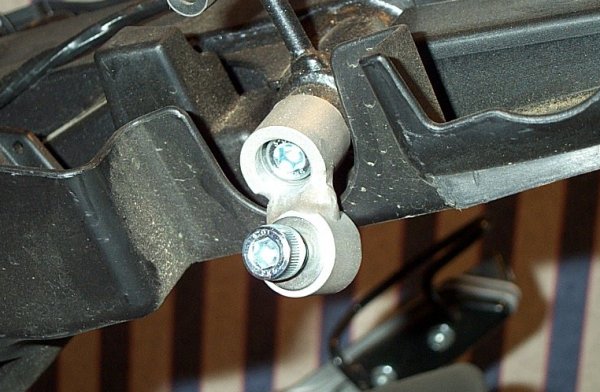
Next install the exhaust mount brackets onto the frame, but do not tighten any of the bolts yet. In fact you need to remove the lower bolt from the bracket mount & keep it close by so you can use it in the next couple steps.
Next slide a hose clamp onto the flange so that the threads face towards the tire & point down from the top. Then slide the pipe flange over the stock Y-pipe connector, but again don't tighten anything yet.
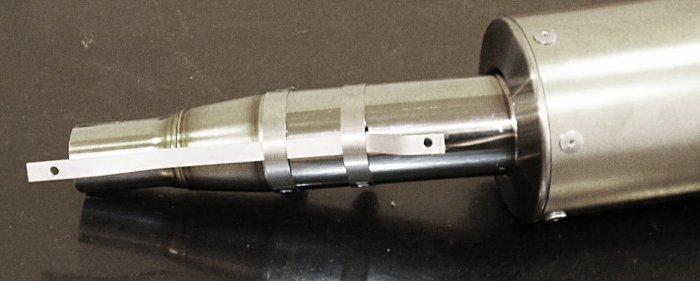
Also don't be a dumbass like myself & forget to remove the stock pipe clamp & then realize after you have been riding around for an hour that it's still on the bike (see pic below)
With the can slid onto the stock connector hold the can with one hand & use your other hand to slide one of the cannister bands into position. You can then use just one hand to hold the exhaust along with the cannister clamp & the other hand to start the thread on the bolt. Go ahead & do this to both sides, but be prepared to do some visual alignment before tightening all the clamps. You will have to rotate the cans a bit one way or the other to make them level with each other when viewed from behind (looking at the tail of the bike) Once you have them aligned properly I suggest tightening the clamp on the Y-pipe first then doing the cannister clamp & the bracket mount bolt. Always recheck all the bolts before putting the plastic & seat back on!
|
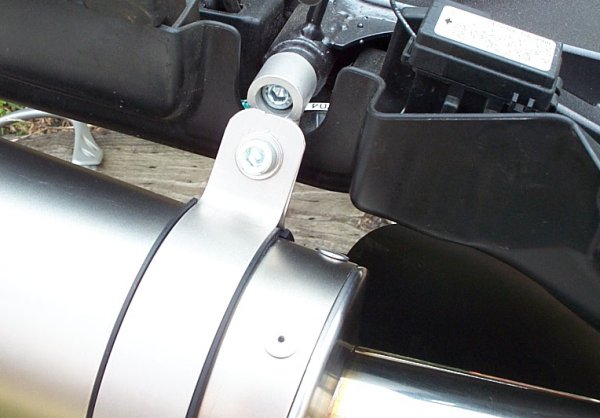
The Heatshields are optional
& at this time
I have decided not to use them, but here are a couple of pics on
how to
install the shields
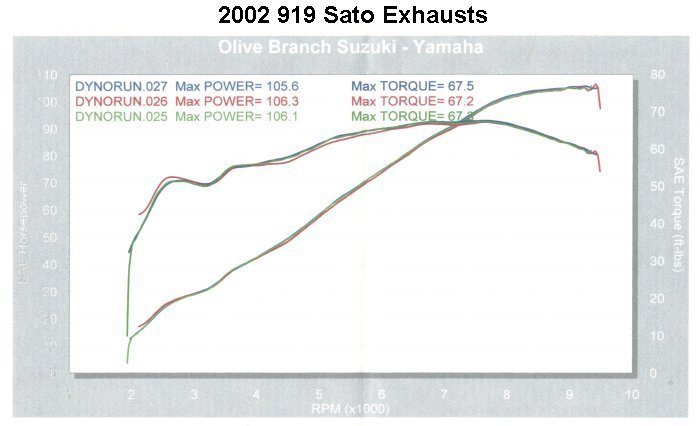
The Results I did not have time to do anything other than a few quick dyno runs, but true to my previous claims of having more power from 4000-7500 rpms you can clearly see a much more defined torque curve especially when compared to the almost flat torque curve that the stock exhaust delivers Hopefully soon I will get the time to do some optimal PCIII mapping for them
|
Quick Pics
I'll get some better pics later, but these will have do for now

Carbon pics courtesy of Joe Silver
Email
the owner/webslave
(C) 2002, 2003 www.919.org ROGUE